Admins and AWS account owners
Connect your AWS account
A connection links one S3 bucket, or one folder of it, to your workspace. It is an IAM role in your AWS account, created from BucketDesk’s CloudFormation template, that BucketDesk assumes with temporary credentials. No access keys are involved.
Only owners and admins can add, change or delete connections, and they need two-factor authentication or a passkey to do it.
Before you start#
- The bucket name and the 12-digit ID of the AWS account that owns it.
- Permission in that account to create a CloudFormation stack that creates IAM roles, or a colleague who has it.
- If the bucket is encrypted with a customer-managed KMS key, the key’s ARN, and a key policy that lets the account’s IAM roles use it.
- On Minimum, one bucket. Standard and Ultra connect any number, from several AWS accounts.
Connect a bucket#
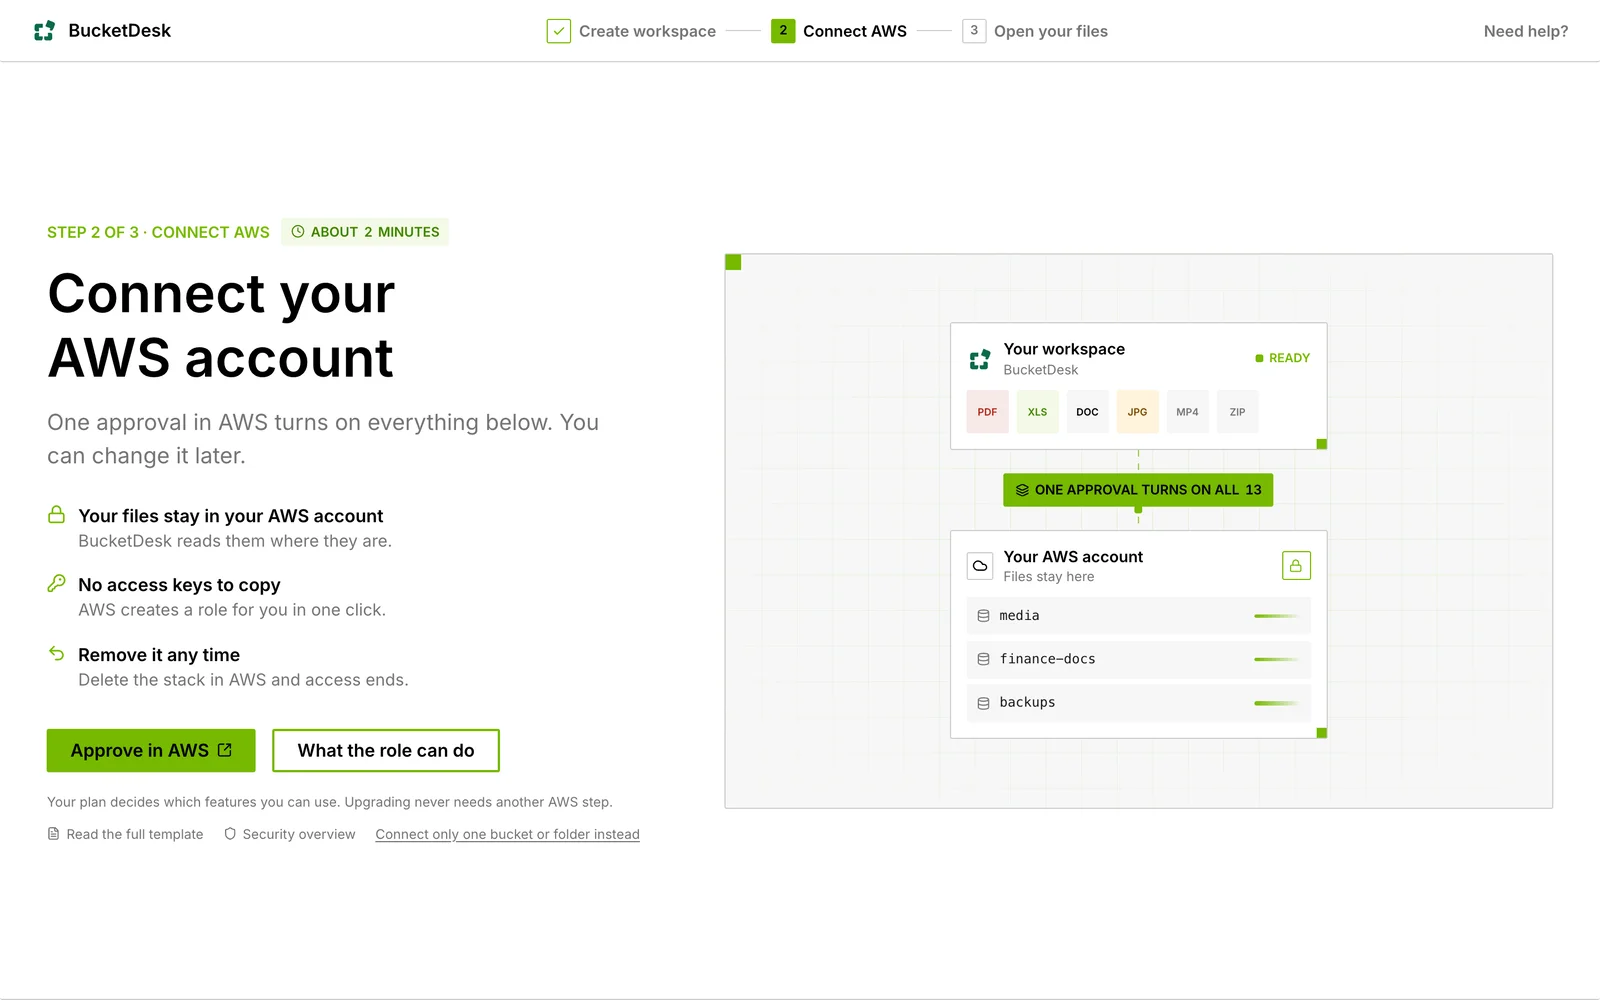
Open Connections. In a new workspace, choose Connect your first bucket; after that, use Add connection. There are three steps.
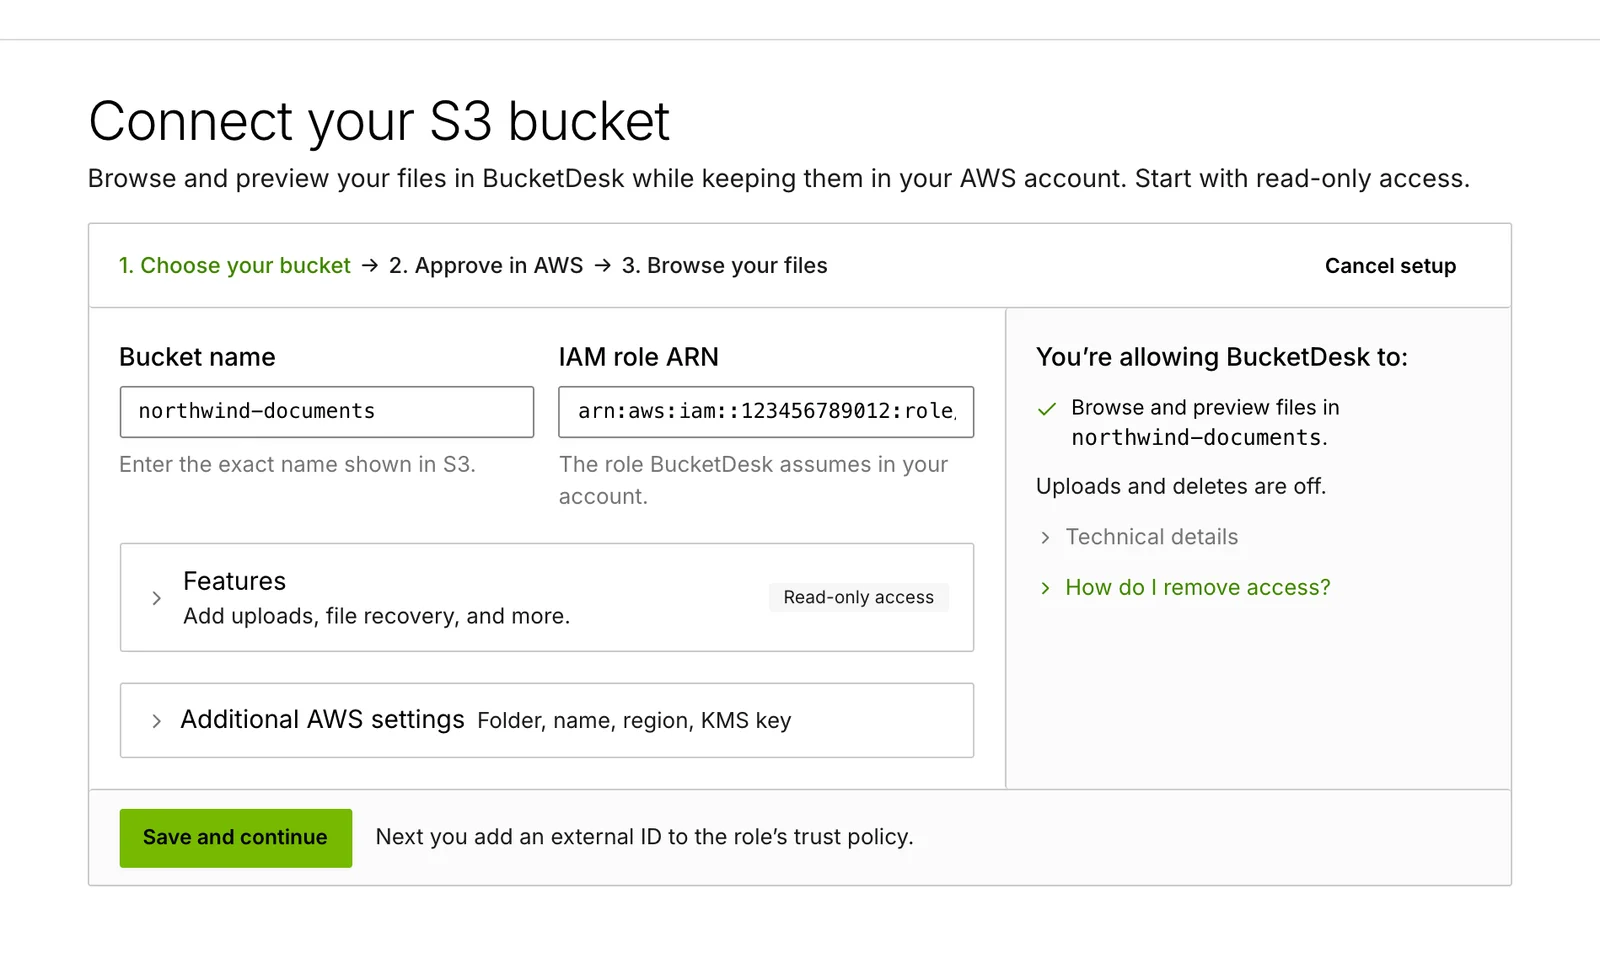
1. Choose your bucket
| Field | What to enter |
|---|---|
| Bucket name | The bucket exactly as S3 names it. |
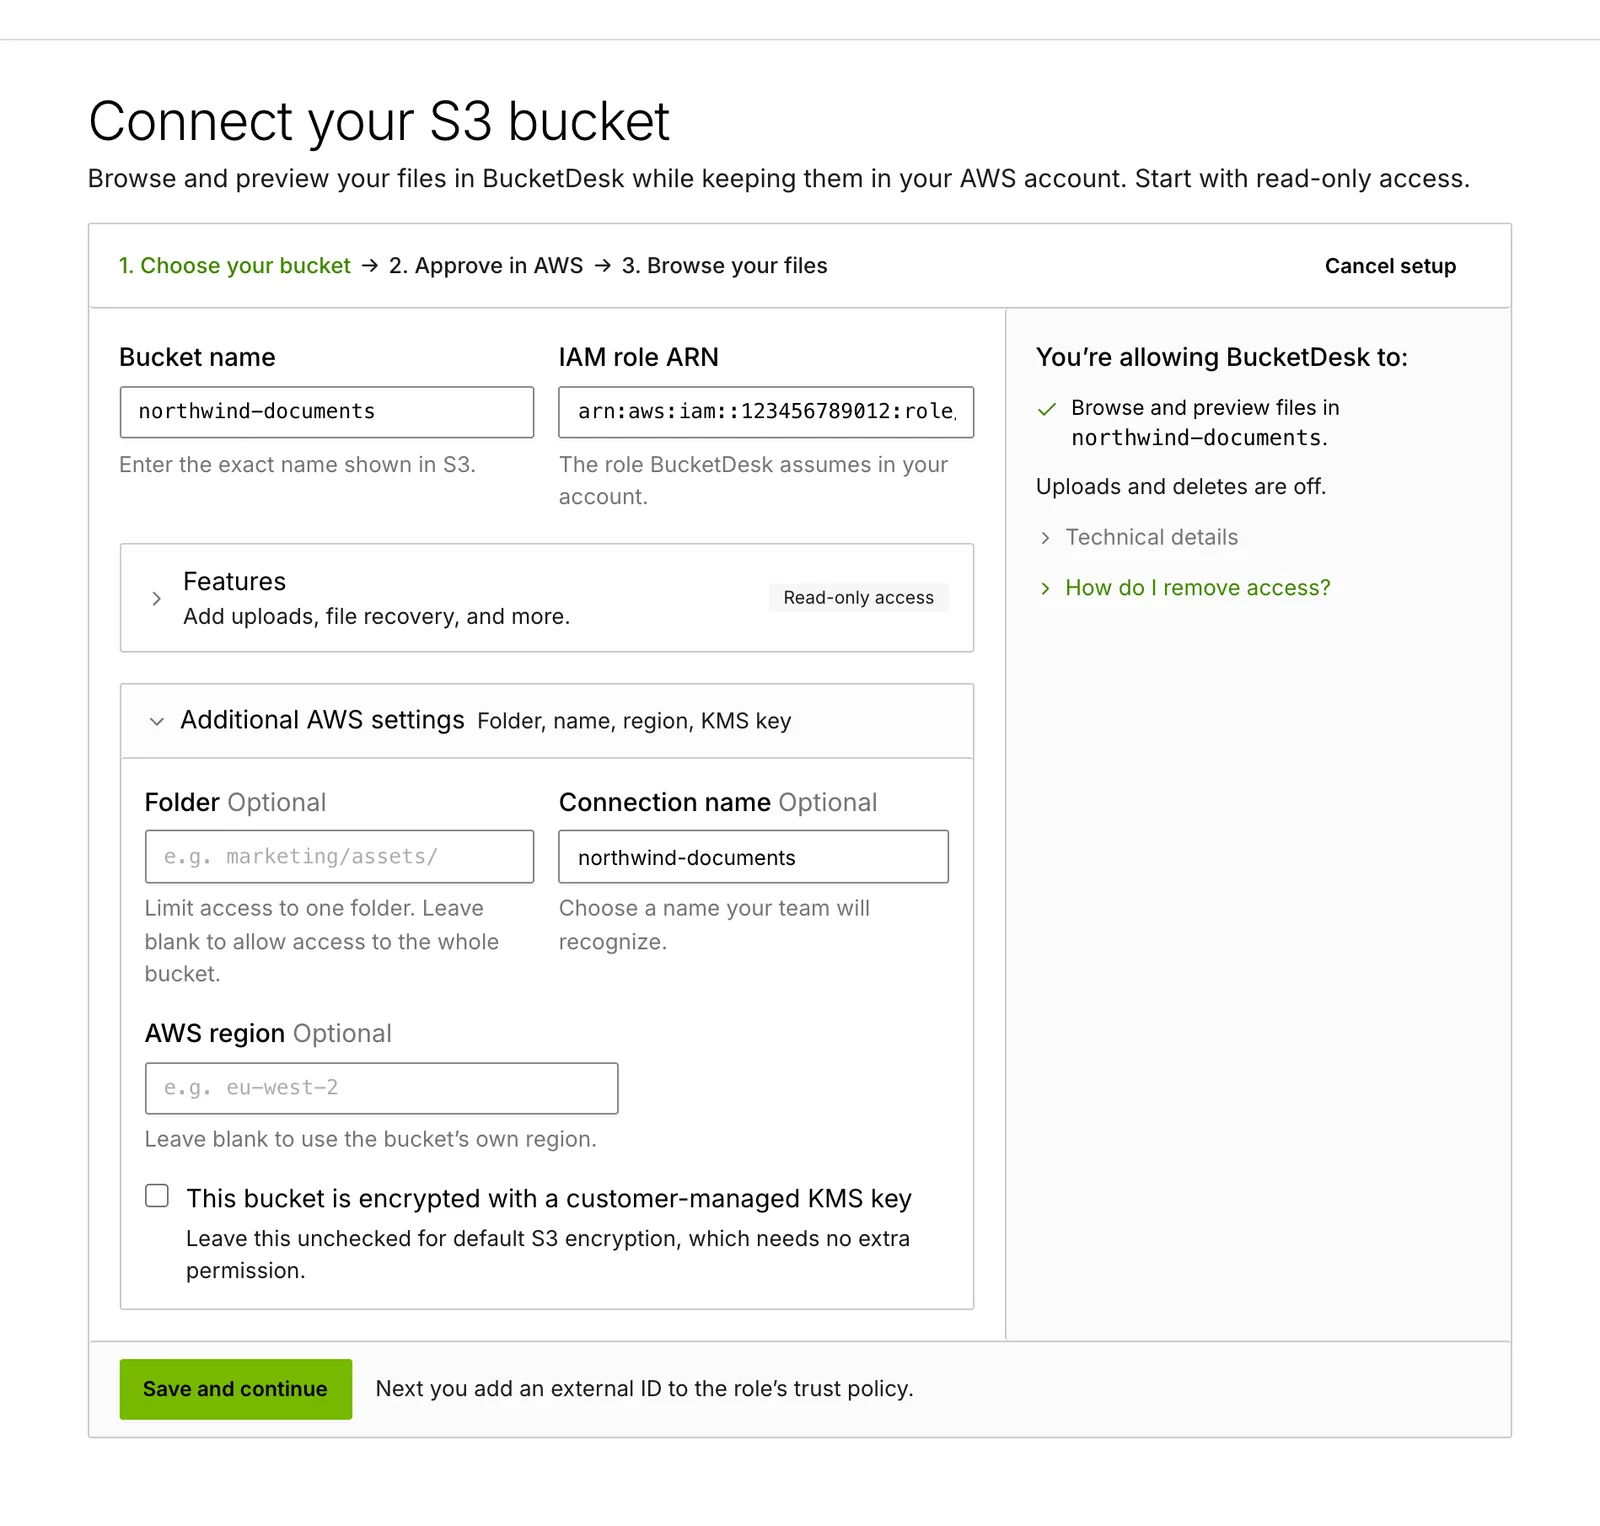
| Folder | Optional. A prefix such as marketing/assets/ limits the connection to that folder. Leave it blank to allow the whole bucket. |
| AWS account ID | The 12 digits of the account that owns the bucket. |
| Connection name | Optional. A name your team will recognise, such as Contracts. |
| Region | Under Advanced AWS settings. Leave it blank to use the bucket’s own region. |
| Customer-managed KMS key | Under Advanced AWS settings. Tick the box if the bucket is encrypted with your own key, and name the key. |
2. Approve in AWS
- Choose Continue to AWS to review. The CloudFormation console opens in a new tab with a stack named
BucketDesk-followed by an ID, and every parameter filled in. - Read the resources and permissions the stack will create.
- Tick the acknowledgement that the stack creates IAM resources, then choose Create stack.
If you do not have that permission yourself, choose Send to my AWS admin. BucketDesk drafts an email with the link, and your admin can use it without a BucketDesk account.
3. Browse your files
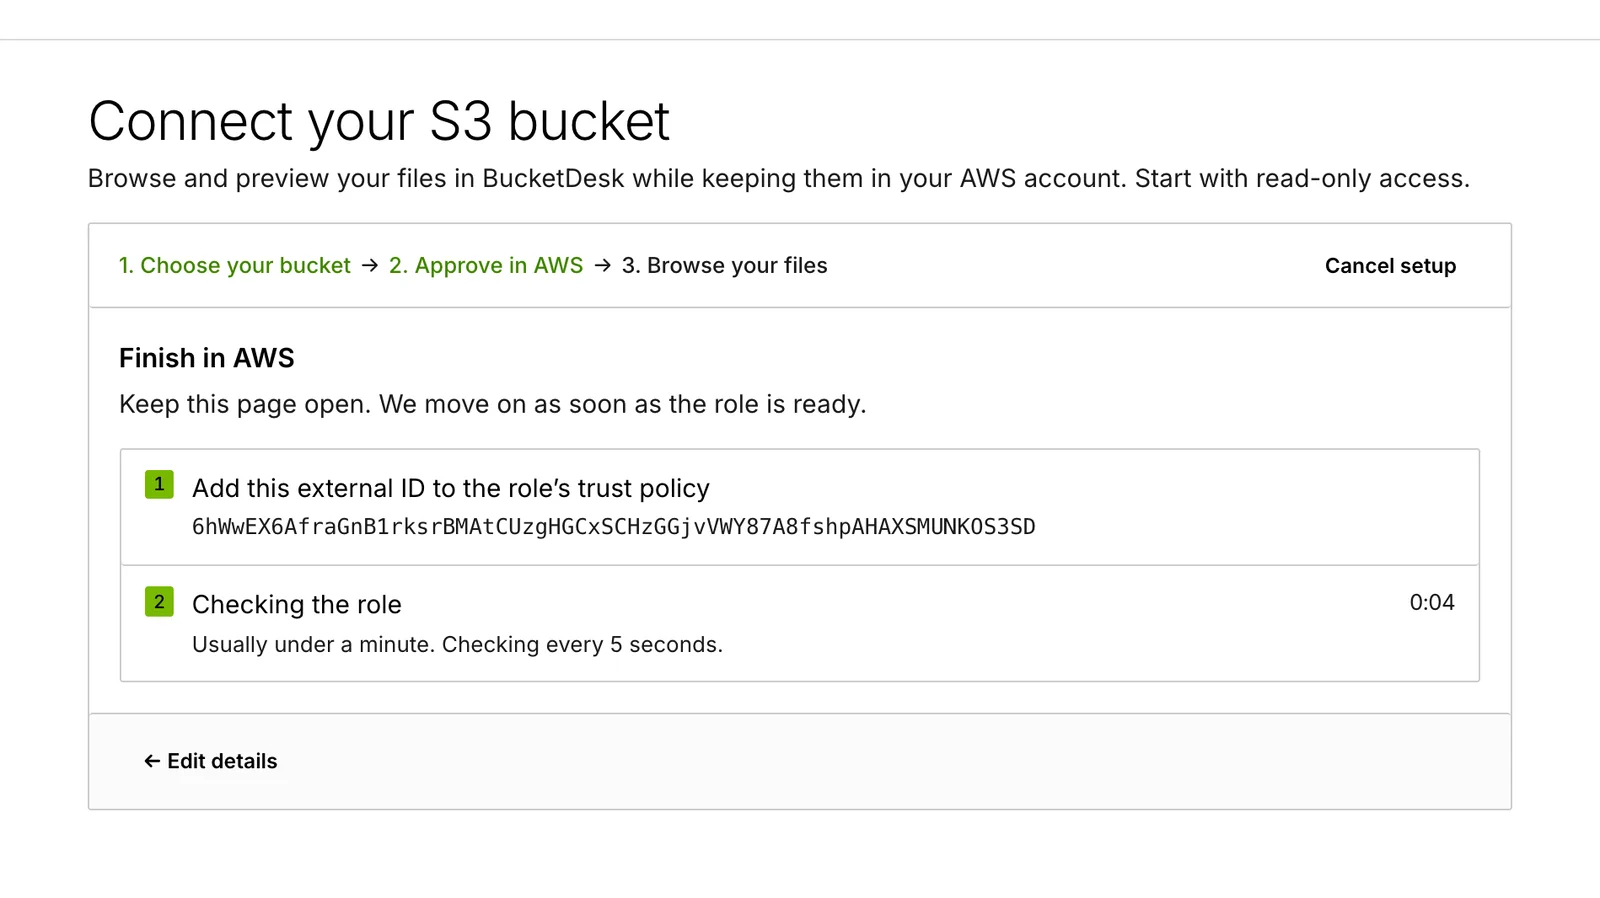
Back in BucketDesk, the page checks the connection every five seconds. It usually turns ready in under a minute, once the stack has finished. BucketDesk assumes the role with the connection’s external ID and reads the bucket’s versioning setting to confirm it can reach the bucket.
Feature switches#
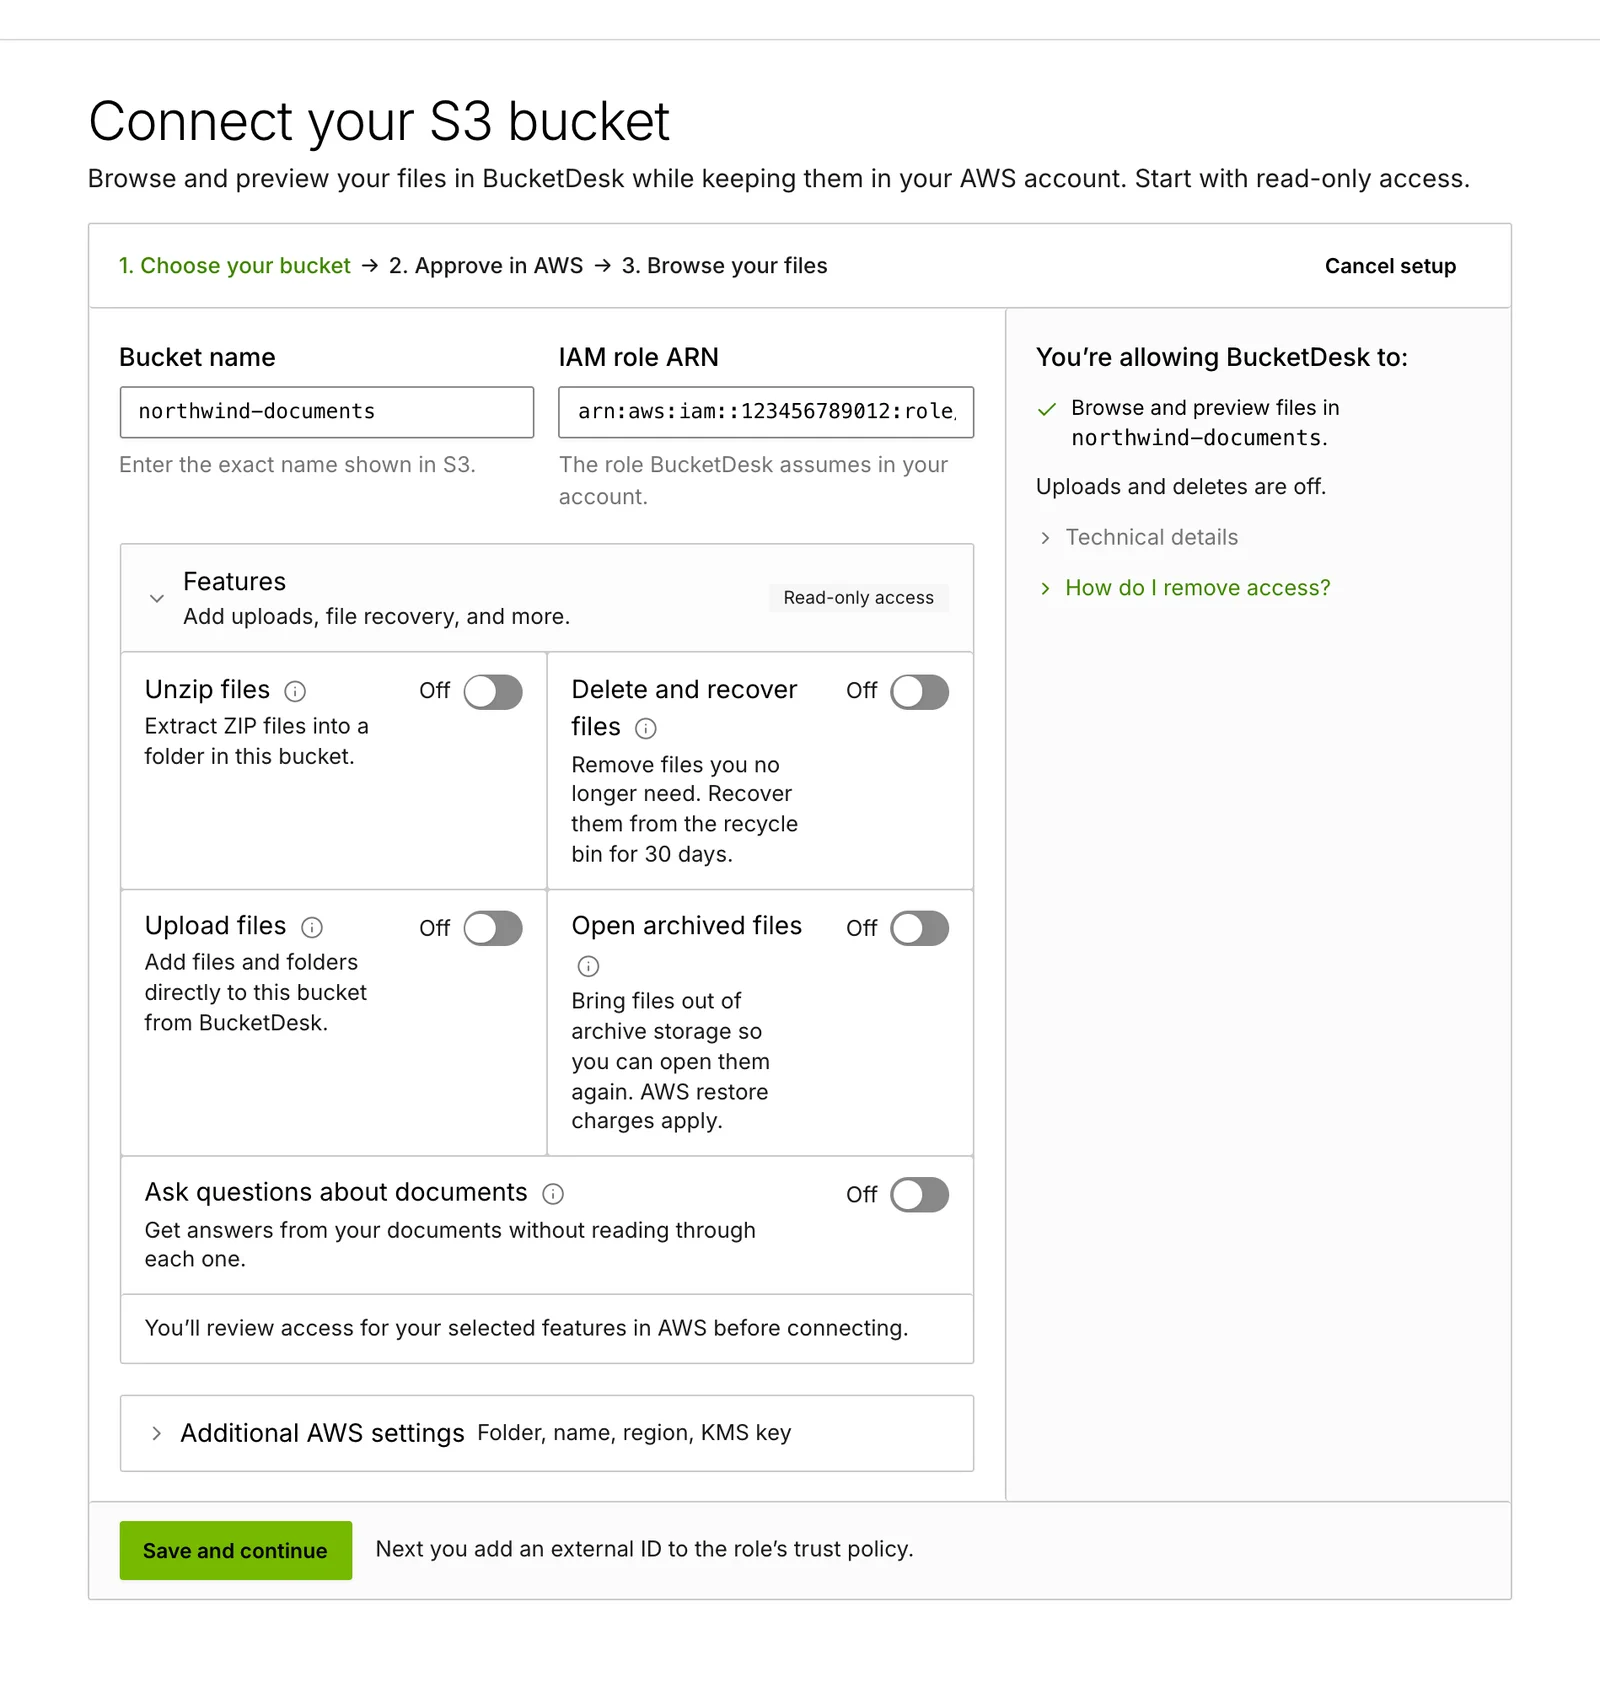
A new connection is read-only. Open Do more with this bucket on the connect form to see the switches. Each one starts off. Your plan decides which switches BucketDesk accepts, and Minimum and Standard can turn on a feature above their plan while its monthly allowance lasts.
| Switch | What it adds | Plan |
|---|---|---|
| Unzip files | Unzips archives up to 50 GB into the bucket, on AWS Batch in your account. | Standard and Ultra |
| Delete and recover files | Deletes, with a 30-day recycle bin inside your bucket. | Ultra, or the Standard add-on |
| Upload files | Uploads from the browser straight to the bucket, plus editing Office files. | Ultra |
| Open archived files | Restores from S3 Glacier and Deep Archive. AWS bills each retrieval. | Ultra |
| Ask questions about documents | Document chat through Amazon Bedrock in your account, using a separate role. | Ultra |
What BucketDesk can do in your AWS account lists the exact IAM actions behind each switch.
Change a switch later
- On Connections, edit the connection, change the switches and save.
- Choose Update role in AWS. CloudFormation opens with the stack update for you to review and submit.
- The connection shows as pending until BucketDesk verifies the updated role.
NoteThe role changes only when you submit the update in AWS. Switching a feature off in BucketDesk and submitting the update removes its permissions from the role.
Uploads and CORS#
Browser uploads need a CORS rule on the bucket. There is nothing for you to add: when uploads are switched on, BucketDesk writes one rule named bucketdesk-uploads during verification and leaves your existing rules as they are.
Use an existing role#
If your organisation creates IAM roles its own way, choose Use an existing role under Advanced AWS settings instead of the guided setup.
- Paste the role’s ARN.
- Add the external ID that BucketDesk shows to the role’s trust policy.
- Verify the connection.
You then maintain the role’s permissions yourself. The action lists on the AWS access page show what each feature needs.
What cannot be changed#
Once the stack exists, a connection’s AWS account, region and setup method are fixed. To change any of them, add a new connection and delete the old one.
Tools install their own stacks#
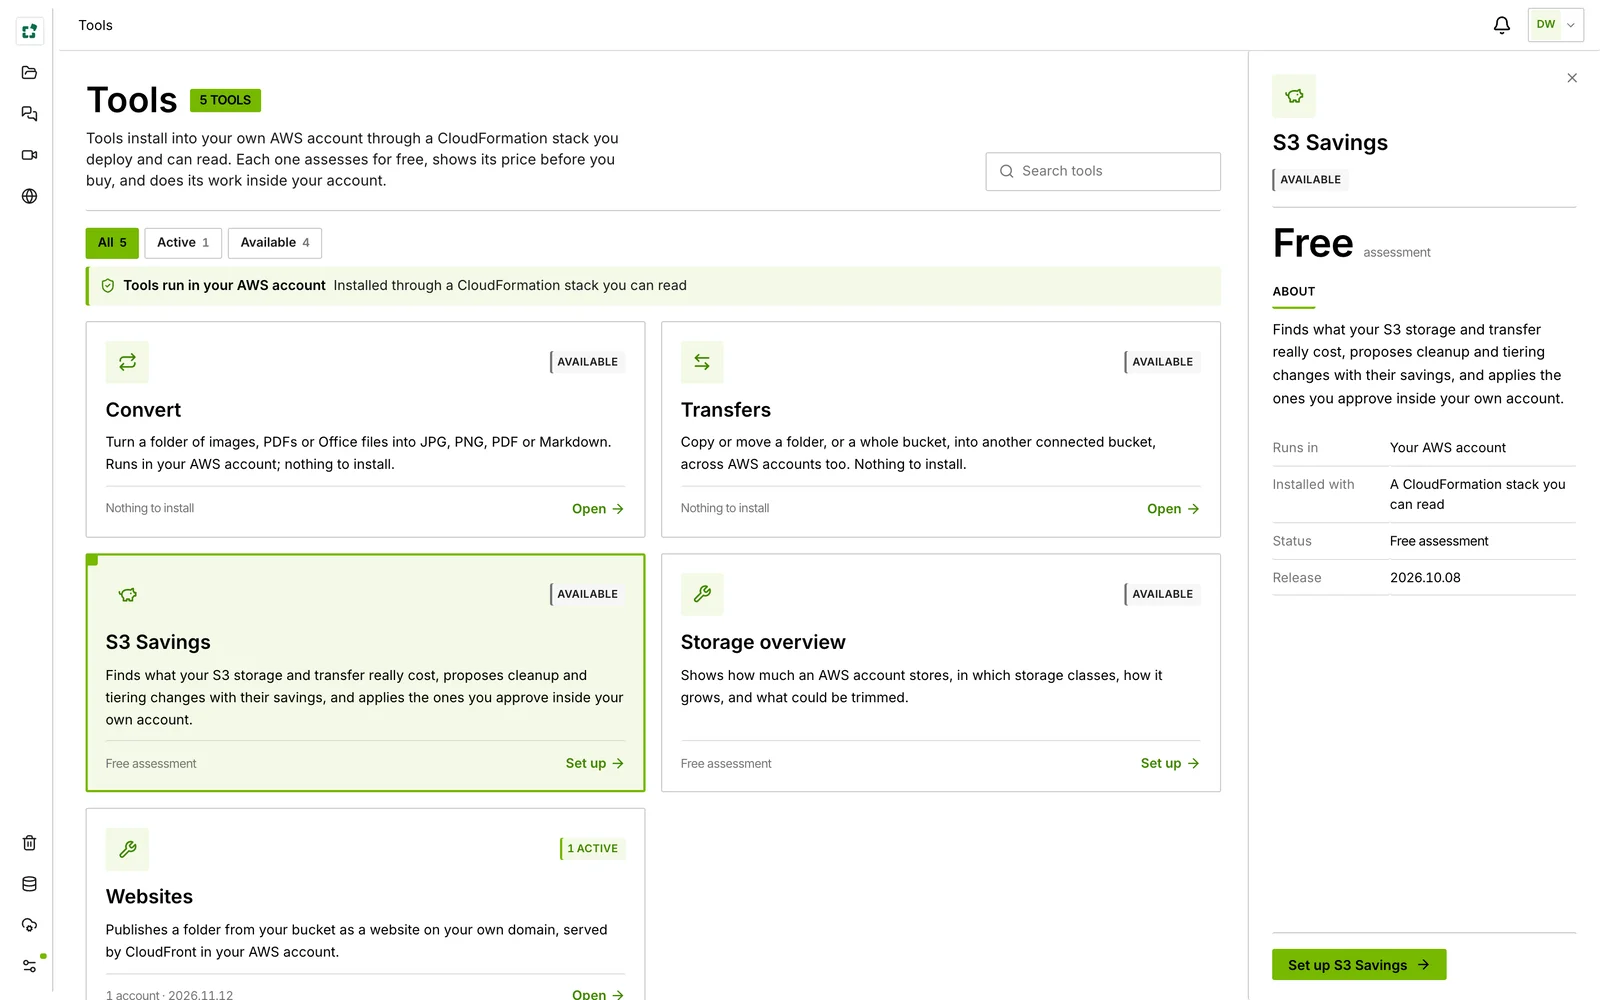
S3 Savings, Storage and Websites are installed per AWS account from the Tools page, each with its own CloudFormation stack and role, separate from your bucket connections.
- Open the tool on the Tools page and enter the AWS account ID and which buckets it may reach.
- Choose Deploy stack in AWS, review it and create the stack.
- Back in BucketDesk, choose Check the stack.
| Tool | What it does | Plan |
|---|---|---|
| S3 Savings | A free, read-only assessment of what the account pays for S3 and what each change would save. Applying changes is charged as a share of verified savings. | Every plan |
| Storage | Size, cost and growth for each AWS account. | Every plan |
| Websites | Publishes a bucket folder as a website through CloudFront in your account. | Standard and Ultra |
Owners and admins install tools.
Troubleshooting#
| Message | What to check |
|---|---|
| AWS could not verify this role. Check that the stack finished and its external ID matches. | Wait for the stack to reach CREATE_COMPLETE. If you edited the stack’s parameters by hand, open the link from BucketDesk again so the external ID matches. |
| The configured bucket does not exist or is not visible to this role. | Check the bucket name for typos and that the bucket is in the AWS account you entered. |
| AWS denied this operation. Review the role policy and selected scope. | The file is outside the connection’s folder, the feature is not switched on in the stack, or a bucket policy or KMS key policy denies the role. |
| The deployed stack is from another release. Update it from the link on this page, then verify again. | BucketDesk’s template has changed since the stack was created. Use Update role in AWS and submit the update. |
| The stack in AWS uses different settings than this page. | The switches saved in BucketDesk and the stack’s parameters disagree. Submit the stack update from the connection, or change the switches back. |
| AWS is temporarily throttling requests. Try again shortly. | Wait a moment and retry. Nothing needs changing. |
| S3 refused this upload from the browser. | The bucket’s upload CORS rule is missing. An admin should update the connection’s stack in AWS and verify the connection again. |
| Files in an encrypted bucket fail to open or upload. | A customer-managed KMS key whose key policy does not allow the role returns AccessDenied. Allow the role in the key policy, and make sure the key is named on the connection. |
Disconnect and remove access#
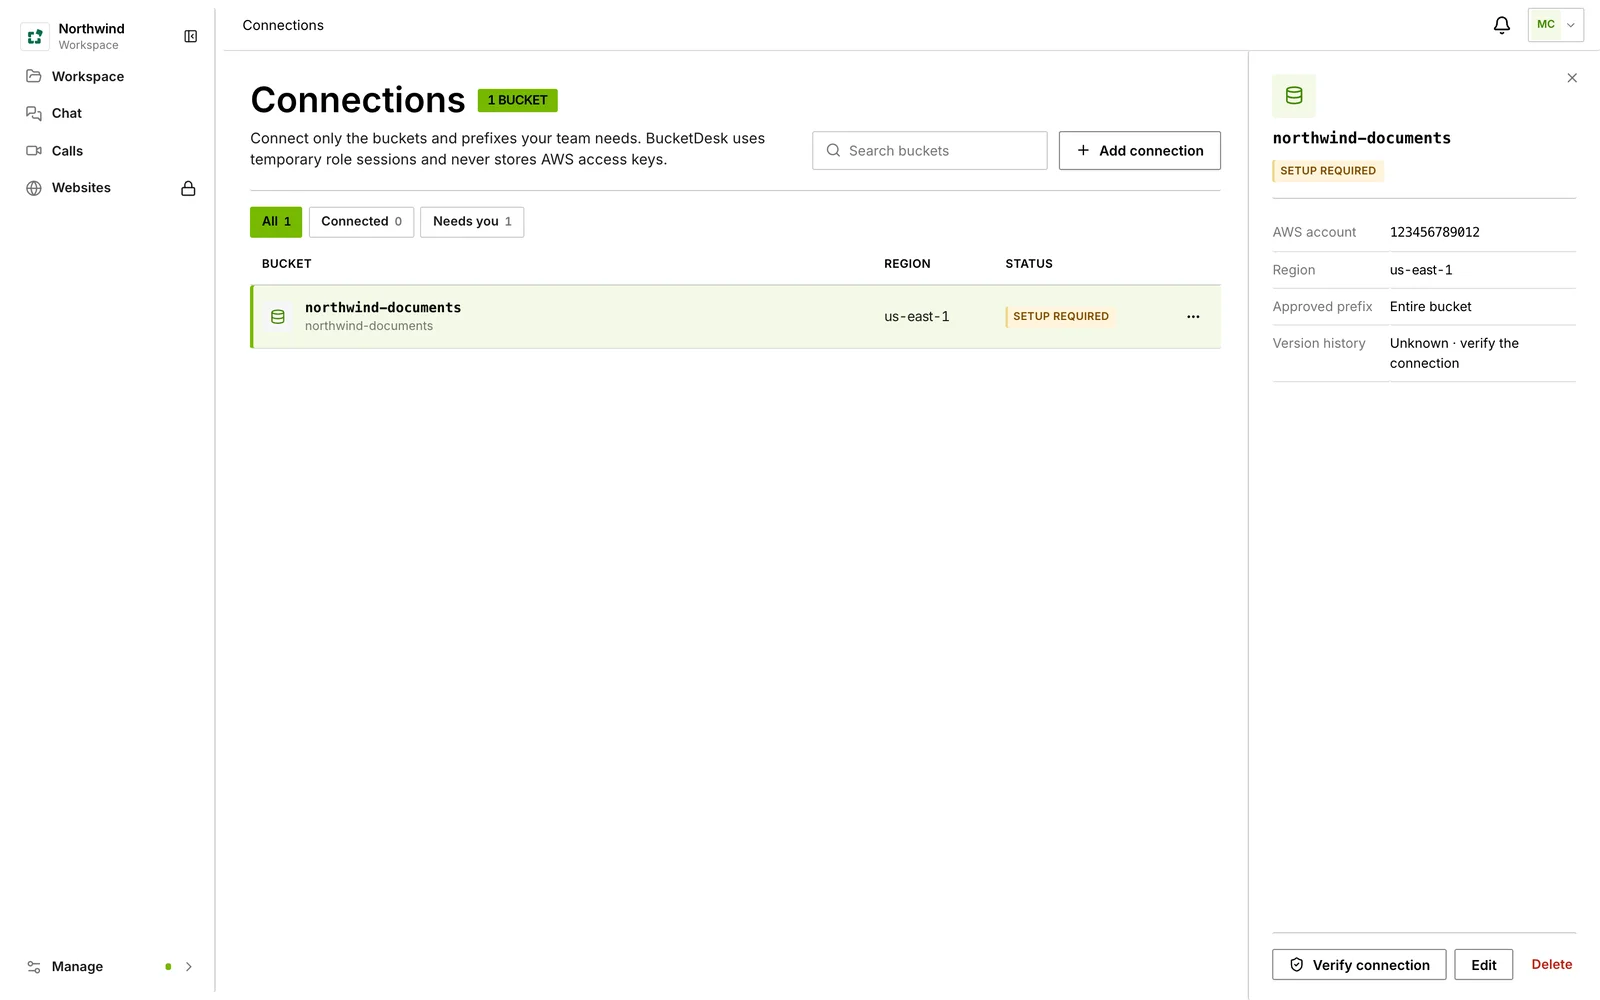
- On Connections, choose Delete connection. BucketDesk names the stack or role to remove in AWS.
- In the CloudFormation console, delete that
BucketDesk-stack.
Your S3 files are not changed. BucketDesk erases the role details at once and deletes the rest of the connection’s record 30 days later. If ZIP extraction was on, its scratch bucket stays behind for you to delete; its contents expire within 7 days.
NoteDeleting the stack is what ends access. You can do it at any time, with or without deleting the connection in BucketDesk first: the role goes with the stack and BucketDesk’s next request is refused.
Something wrong or missing on this page? Email info@bucketdesk.com. Last updated November 12, 2026.